Adding Multi-Factor Authentication (MFA, 2FA) To Ubiquiti Unifi VPN
Over the past several years, I’ve become a fan of Ubiquiti’s line of Unifi hardware and software. The ability to see all the compatible network devices and configure them from a unified UX has become one of my favorite aspects of their products. However, one of the aspects I find them lagging behind is their options for client virtual private networks (VPN).
Introduction
With ransomware always on the rise, it is more important than ever to add additional layers of security to your networks. Even Linux and Mac are not as safe no longer being ignored by hackers, and new ransomware continues to add Linux to its sights. Adding multi-factor authentication (MFA) to logins has proven to be one of the best ways to safeguard systems and networks.
During the pandemic, VPNs became a standard for the ubiquitous work-at-home trend. While neither VPNs nor working from home are new concepts, many companies that never implemented remote access for their employees had to quickly deploy these technologies to keep their businesses running and their employees safe.
While VPN traffic is encrypted by default, most implementations still require a username and password to authenticate the employee. Weak password policies, default passwords, and shared credentials are amongst some of the largest reasons many networks fall to ransomware and hackers. Adding an additional layer of security to a simple login will greatly reduce the chances of exploitation.
While Unifi has introduced “Unifi ID” and “Unifi Teleport” for secure VPN access, these options are only available on their latest and greatest consoles. For those of us running anything just a few years older, e.g. a Security Gateway (USG), we’re a little out-of-luck at having a contained solution for multi-factor authentication for client VPNs.
When creating a client VPN in the Unifi interface, you can assign any valid Remote Authentication Dial-In User Service (RADIUS) server to the VPN for authentication. The Unifi Security Gateway line (including the “Pro” models), all have a RADIUS server running. By itself, their implementation is very basic, only allowing the creation of usernames and passwords, so an additional service will be necessary to implement a second layer of security.
Enter Duo, a company specializing in Two-Factor Authentication and Data Protection. They have an authentication proxy that can be installed on your local network. This proxy can act as a RADIUS server that can be assigned to a client VPN in the Unifi interface. On the backend, the proxy can connect to another RADIUS server, or LDAP if Active Directory or Samba domains are available for authentication.
For multi-factor security, the proxy also integrates with Duo’s 2FA services and sends a push notification to users, so users must authenticate in the Duo mobile app after entering their credentials in order to establish a VPN connection.
For those of us in smaller office environments, or for home use, Active Directory or a RADIUS server for authentication may either not be available, or be overkill for our needs. As I wrote earlier, there’s an internal RADIUS server on the Unifi Security Gateways which can be used in conjunction with the Duo’s Authentication Proxy. Let’s look at setting this up.
Set Up a Duo Account and Users
Head over to Duo and set up an account. Their pricing is very reasonable based on the number of users required, and they also have a free tier which will work fine for smaller office environments and/or home use.
Once you’ve set up and verified your Duo account, the next step is to add your users. All that needs done in Duo is ensuring the usernames match the usernames that were created in the Unifi interface. Provide each user’s e-mail address, and be sure to click the link to send their enrollment e-mail.
Finally, credentials for connecting the authentication proxy to Duo are needed, so an application needs to be set up under the “Applications” screen. In the list of applications available, select “Partner Auth API”. Take note of the integration key, secret key, and API hostname for later.
Install and Configure the Authentication Proxy
The Authentication Proxy can be installed on either Windows or Linux. Duo provides up-to-date instructions for installing, updating, and maintaining the service.
Once the service has been installed, the default configuration file needs to be updated to work with the Unifi Client VPN. For Linux systems, the configuration file can be found at /opt/duoauthproxy/conf/authproxy.cfg
; Complete documentation about the Duo Auth Proxy can be found here:
; https://duo.com/docs/authproxy_reference

; NOTE: After any changes are made to this file the Duo Authentication Proxy
; must be restarted for those changes to take effect.

; MAIN: Include this section to specify global configuration options.
; Reference: https://duo.com/docs/authproxy_reference#main-section
;[main]


; CLIENTS: Include one or more of the following configuration sections.
; To configure more than one client configuration of the same type, append a
; number to the section name (e.g. [ad_client2])

[radius_client]
host=IP address of Unifi Security Gateway
port=1812
secret=Password #1

; SERVERS: Include one or more of the following configuration sections.
; To configure more than one server configuration of the same type, append a
; number to the section name (e.g. radius_server_auto1, radius_server_auto2)

[radius_server_auto]
ikey=your Duo interface key
skey=your Duo secret key
api_host=your Duo API hostname
radius_ip_1=IP address of Unifi Security Gateway
radius_secret_1=Password #2
failmode=safe
client=radius_client
port=1813
Essentially, this configuration is setting the Unifi Security Gateway as a permitted RADIUS client (meaning non-listed IPs will not be able to communicate with the proxy). This configuration also establishes the Unifi Security Gateway as RADIUS server that will be used for authenticating user credentials. Passwords #1 and #2 will be re-used when configuring the Unifi Client VPN, so be sure to keep these on hand. Additionally, note that this configuration is using port 1813 (UDP) for authentication.
When an authentication request comes to the proxy, it will first reach out to the Unifi RADIUS server to authenticate the user’s username and password. Upon success, the proxy will then send out an authentication request to Duo’s servers, triggering a push notification to the user’s mobile device(s). If the user successfully authenticates from the mobile device, the user will be authenticated to the VPN.
Configuring Unifi
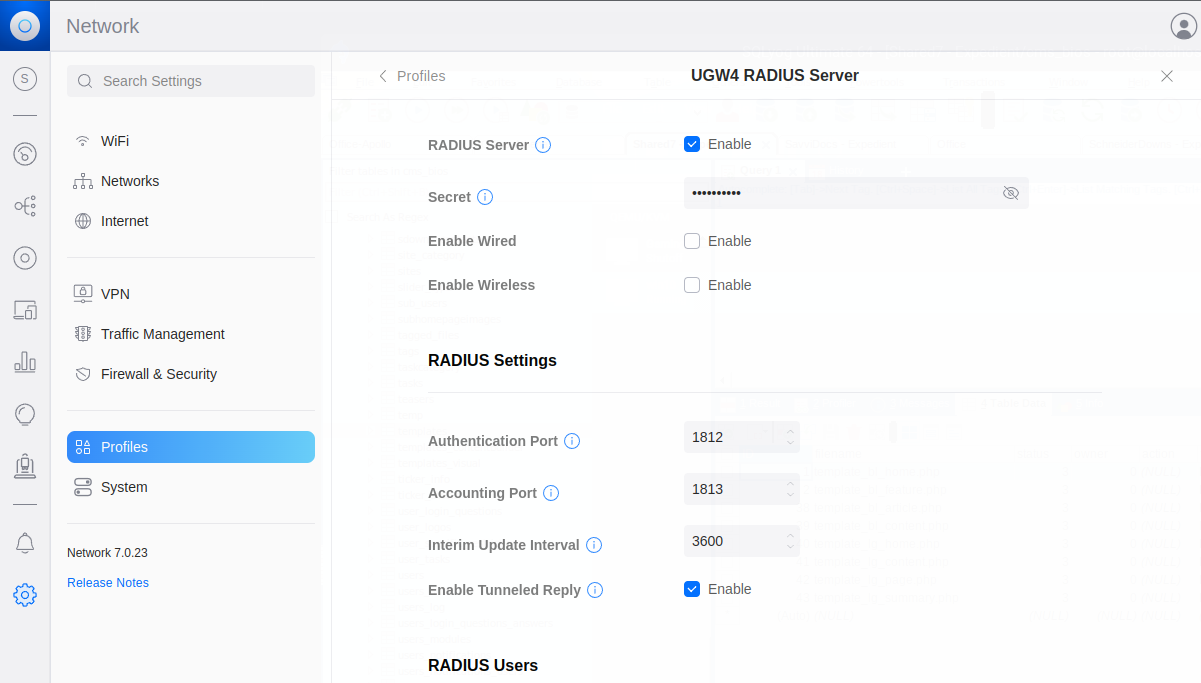
From the Unifi dashboard, click on the “Gear” icon in the left-hand navigation to go to the Settings screen. From here, go to “Profiles” and scroll down to “RADIUS”. There should already be a “Default” profile here. Go into this profile and ensure it is enabled, and enter Password #1 from the above section into the “Secret” field.
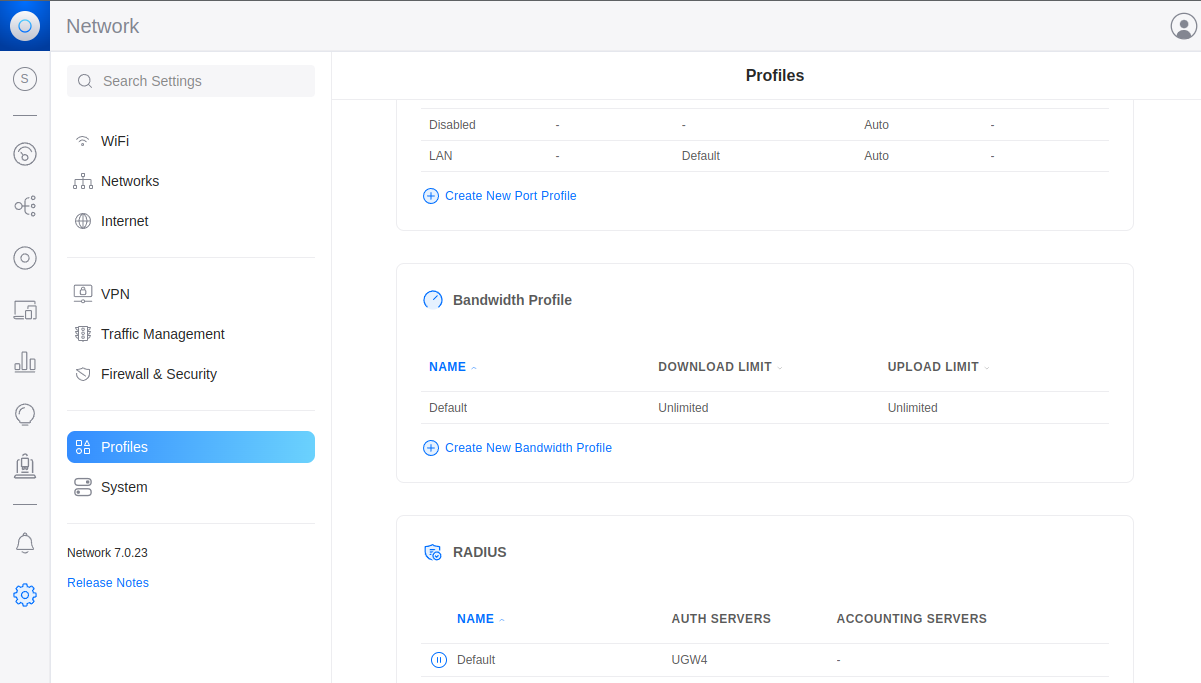
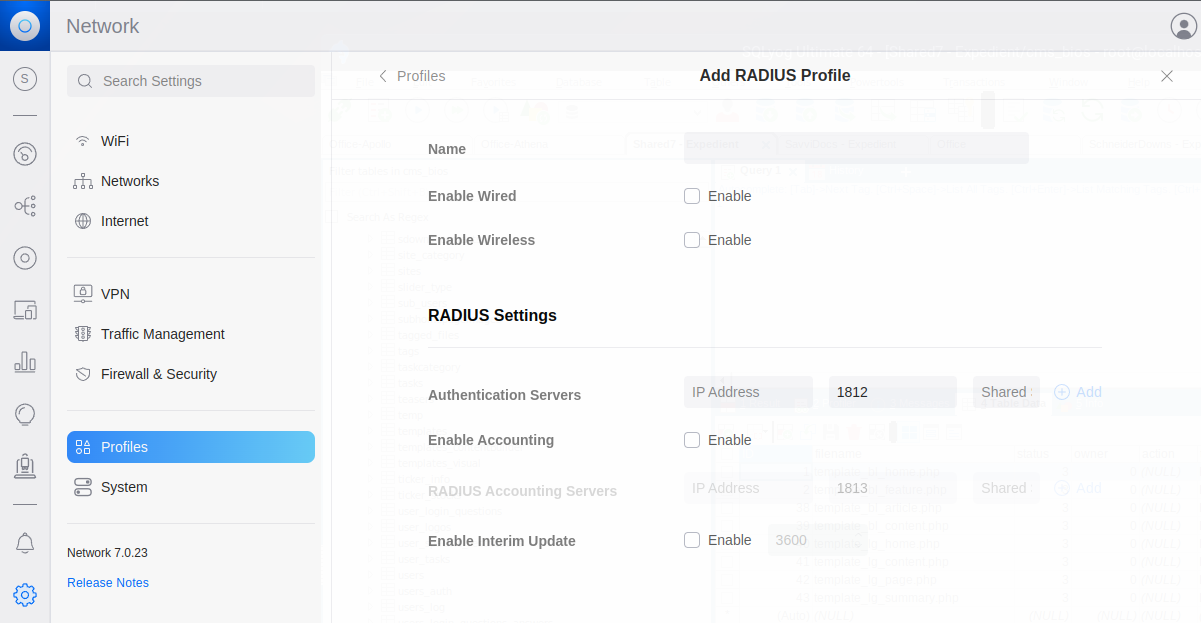
Back from the profiles screen, click on “Create New RADIUS Profile”. “Name” is arbitrary, however for the sake of accuracy, “Duo Proxy” would be sufficient. Under “Radius Settings”, “Authentication Server” will be the IP address of the server running the Duo Authentication Proxy, and the port will be 1813 based on the configuration from above. “Shared Secret” will be password #2 from the configuration above. Click “add”, then “Apply Changes”.
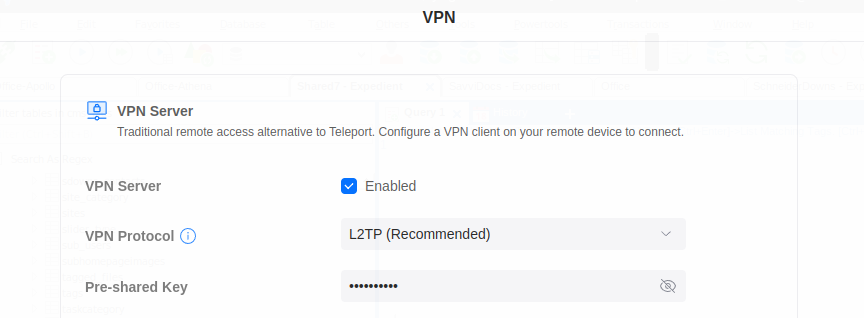
Next, head over to the VPN settings. Configuring the VPN itself is outside the scope of this article, but if this hasn’t been completed already, enable the VPN, set the protocol to “LT2P”, and create a pre-shared key.
Again, if this hasn’t been done already, add your VPN users. Remember that the usernames must match the usernames that were created in Duo.
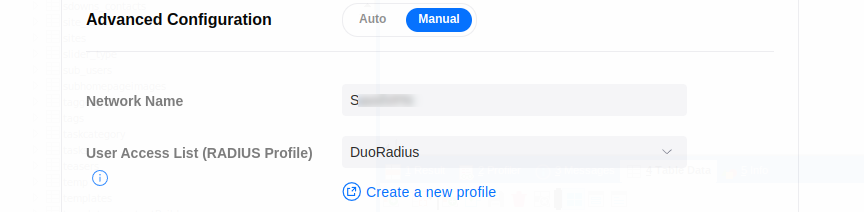
Finally, under the “Advanced Configuration”, name the VPN and set the RADIUS Profile to the Duo Radius profile created in the steps above.
Click on “Apply Changes”, and the Unifi Client VPN should now be protected with MFA. All client VPN connection attempts with a valid username and password will now trigger a push notification to user mobile devices through the Duo app.
Wrapping Up
As far as troubleshooting goes, the Authentication Proxy logs to /opt/duoauthproxy/log/ by default. If a firewall is active on the server running the proxy, an exception will need to be added for UDP port 1813 (per the configuration in this article) so external connections are allowed. Since authentication is completed over UDP, the Unifi Security Gateway and Authentication Proxy will need to be on the same physical network.
Finally, it’s recommended that the Duo Authentication Proxy is started at boot. Otherwise, you may lose remote access if the authentication server reboots from a power outage or other issue. The installed installs a systemd script by default, so this is as easy as:
sudo systemctl enable --now duoauthproxy.service
Now complete, remote access to your networks should be protected with more than a simple username and password.
With the Duo Authentication Proxy in place, multi-factor authentication could also be extended to additional services on your network such as Wifi, SSH, logins, and more. For a more integrated solution, a RADIUS server such as FreeRADIUS could be implemented on the network to replace the very basic RADIUS features server available from the Unifi Security Gateway, allowing for enhanced password policies, user maintenance portals, and more. If you’d like to read more about these possibilities, let us know in the comments.