
When space and noise are concerns, rackmount servers don’t always provide the best option for a small office server. With the flood of “cheap” AMD Epyc CPUs and motherboards from China on eBay, I found it easy to build a quiet dual-Epyc CPU server.
Introduction
My company recently downsized office space due to the pandemic, and we no longer had a closet to store a server rack and servers in. We also found that having a server rack in an open floor plan office wasn’t conducive for hosting client meetings due to both the heat and sound from the servers. Given these issues, I was given the task of relocating our network equipment to a more hidden location and replacing our servers with a quieter solution. Relocating our network equipment was easy – a wall-mounted rack was placed in a corner of the office behind a support pillar, making our Ubiquiti equipment somewhat “out of sight” (did you see our article on setting up a Multi-factor Authentication VPN on Unifi?).
Our server infrastructure consisted of two Dell R720 servers running VMware ESXi, with an old Dell Compellent disk shelf attached to one of them, and a custom-built NAS running TrueNAS in a Supermicro chassis. The R720s ran VMs for tasks such as DHCP, DNS, MySQL and MSSQL servers, and plenty of docker containers for our microservices and testing / deployments. Our NAS has essentially been collecting dust since we began storing most of our files on Google Drive, but we did have all of the backups from the VMs being stored on it – so massive amounts of storage weren’t really a need anymore. All of this infrastructure was well over a decade old. Replacing it meant building a solution with newer equipment that will last us another 5-10 years, and could be easily expanded if needed.
And so I had my goals:
-
Quiet
-
Easily stored in the office without a rack
-
Capable of running multiple VMs
-
Modern components
-
Expandable
Selecting an Enclosure
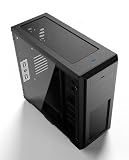
From the get-go, I knew I wanted a tower server. It would fit in the corner of the office under our new wall-mounted network rack. I also knew I wanted a dual-CPU setup, so the case would need to be able to fit an EATX motherboard. Lastly, I wanted something that I could add additional storage to down the line, so having as many 3.5” and 5.25” bays as possible was also a requirement. Given that I’ve been building computers for well over two decades, I had some pretty good ideas of the style of case I wanted.
After a few searches on NewEgg and Amazon, I was quick to learn that the type of cases I wanted aren’t made anymore. With the downfall of optical media, finding a case with more than one or two 5.25” bays is a challenge. eBay could have been an option, but I wanted to ensure we got all the parts and accessories that ship with a new case.
I ended up settling on the Phanteks Enthoo Pro, which has four 5.25” bays (albeit one is taken up by front panel connections), six 3.5” bays, and two 2.5” bays. Additionally, the case can fit a total of seven 140mm fans, providing plenty of airflow. The side panel is tempered glass, but it won’t end up being visible given the way the server will be situated in the corner of our office.
“Cheap” Epyc CPUs, Motherboard, and RAM from eBay
eBay has been flooded with first- and second-generation Epyc CPUs and motherboards from China. At the time of writing, I was able to find a listing for a Supermicro D11HSI motherboard, dual Epyc 7302 CPUs, and 128GB of RAM for around $700. The Epyc 7302 is a second-geneartion Epyc CPU with 16 cores and 32 threads, and the Supermicro D11HSI provides plenty of PCI-E expansion and IPMI remote management in an EATX form factor.
As always, some research is necessary when buying products from eBay. Specific to the Epyc CPUs, it is important to verify the CPUs are unlocked – otherwise they may only work with specific motherboards.
Enterprise NVMe Storage
A pair of Samsung EVO 870 SATA drives would be used for booting VMware ESXi in a mirrored configuration. For virtual machine storage, I wanted a minimum of 7.5TB of fast storage.
SAS, SATA, M.2, U.2, U.3, E1.s – so many options for storage. For performance concerns, SATA and m.2 drives weren’t even a consideration in this build. U.3 and E1.s drives turned out to be difficult to find on the consumer market, and the backplanes for these are still quite pricey – and rare. M.2 drives are plentiful and reasonably priced in the current market, but their performance and longevity were still a concern for me.
After finding a four-drive U.2 backplane, the ToughArmor MB699VP-B
The U.2 drive interface may look similar to a SAS interface, however it is slightly different (seriously, don’t try hooking one up with a SAS cable), and the controller would need to support U.2 drives as well. Thankfully, Icy Dock provides plenty of documentation on compatible controllers and cables for their drive cages. Additionally, the server would be running VMware ESXi 6.7 when completed, so a RAID controller would also be necessary rather than a HBA since VMware doesn’t support software RAID or ZFS.
Tri-mode controllers can be configured to support a combination of SATA, SAS, and NVMe drives. I selected the Broadcom 9460-16i, which can support a maximum of four x4 NVMe drives, perfect for the Icy Dock drive cage. This would be used to run the Intel U.2 drives in a RAID5 configuration.
The last piece of the puzzle was finding the correct cables that would connect from the RAID controller to the drive cage. Icy Dock recommended the Broadcom 05-50061-00 cable, which was incredibly hard to find. Even after finding a retailer with it in stock, the cables didn’t work. The difference between these and standard SFF-8643 cables is that a U.2 enabler is needed, which directs the PCI-Express signals. Big thanks to Taylor and SerialCables.com for coming through with a working set of cables.


Power Supply
Aside from buying a power supply from a reliable brand, this was not a huge concern for the build. The Supermicro HS11DSI motherboard does require two 8-pin CPU connectors, so this was the only important factor to consider. The server won’t be running a GPU anytime soon, so a 850W unit from Corsair checked all the boxes, with room for expansion down the road.

Cooling
When it comes to quiet cooling, Noctua is one of the top names on the market. A handful of their A14 and A12 fans would provide case airflow, and NH-U9 supports the SP3 socket. Despite the tempered glass window on the Enthoo, the is
a lack of RGB lighting in this build.


Backup Storage
While a dedicated NAS may be purchased down the road, it wasn’t part of this budget. Initially, I had planned to install a handful of spinning drives in the Enthoo, but eventually decided not to. While these would provide ample storage and could be passed through to a TrueNAS VM or similar, they wouldn’t be easy to access if there was a hardware failure on the server. Due to this consideration, I opted for a 4-bay RAID enclosure from QNAP with USB-C connectivity – the TR-004.
Integrated RAID on the enclosure removes any OS requirements, and the USB-C connectivity ensures both fast transfer speeds and the ability to connect it to other systems in the event of hardware failure in the server.

Final Considerations
The Supermicro H11DSI only provides gigabit ethernet interfaces, so to provide 10GB connectivity I added an Intel X520 card with dual SFP+ interfaces. This will connect to our office’s network through the SFP+ ports on our Ubiquti switch.
The Phanteks Enthoo has a USB-C port on the front of the case, and the QNAP TR-004 would achieve its fastest speeds over a USB-C interface. The Supermicro H11DSI doesn’t provide USB-C connectivity, so an add-on card is needed. I found a PCI-Express card that provides both external USB-C 3.2 ports, as well as an internal USB 3.2 header for the case. This card would be passed through directly to our Windows Server 2016 VM, making it easy to share the TR-004’s storage on our network.

Putting It All Together
Assembly was completed without a hitch. The Supermicro H11DSI provided plenty of fan headers to power all the Noctua case fans, and the Phanteks Enthoo Pro made cable management a breeze.
The only issue that popped up was after assembly. The 9460-16i RAID controller was not seeing the Intel U.2 drives. I double-checked the specialized cables and reset the controller’s settings, however no matter what I tried, the drives were not detected.
After several days of research on the internet, the only possible solution I could find was the cables I was sent were wrong. Unfortunately the vendor insisted they were the correct cables and would neither issue a refund nor send new cables. I was back to trying to source the cables again.
Enter SerialCables.com. While certainly not the cheapest listing I could find, they provided an excellent experience. After placing my order, Taylor reached out to me asking if their lead time on the cables was acceptable. I explained my situation to Taylor, Taylor brought in a sales engineer and even provided a schematic for the cable so I could verify it was what I needed. There was a few weeks of lead time, but sure enough the cables came.
After configuring the RAID controller for NVMe drives and switching to the new cables, the Intel U.2 drives were finally detected. Now I was able to install ESXi and finish configuring the server.
Conclusion
At a hair under $3,500, this server went together almost without any issues. With its 32 cores, 128GB of RAM, and speedy U.2 NVMe storage, this server far outshines the Dell R720 servers it is replacing. Thanks to the Noctua cooling, the server runs near silent – it can barely be heard even with a fair load running. For the price and performance, I don't believe I'd be be able to find a similar off-the-shelf server anyhwere close to $3,500.
After three months of operation, we haven’t experienced any stability issues. There are still several PCI-Express slots and drive cages available in the case, so we can continue to expand the server as required – however the next addition will probably be a dedicated NAS for a better backup solution. I’ve included a full build list below for those interested:
| Component | Product | Quantity | Price |
|---|---|---|---|
| Case | Phanteks Enthoo Pro | 1 | $138.46 |
| CPU | AMD Epyc 7302 | 2 | $699.00 |
| Motherboard | Supermicro H11DSI (shipped with CPUs) | 1 | |
| RAM | 32GB eBay Special (shipped with CPUs) | 4 | |
| Powersupply | Corsair RM850x | 1 | $134.99 |
| Boot Drives | Samsung Evo 870 250GB | 2 | $58.62 |
| Storage | 3.84TB Intel U.2 PCI-E 3.0 | 4 | $636.96 |
| Drive Enclosure | IcyDock ToughArmor MB699VP-B | 1 | $365.18 |
| RAID Controller | Broadcom 9460-16i | 1 | $499.00 |
| U.2 Cables | Broadcom 05-50061-00 1m x8 SFF-8643 to 2 x4 SFF-864 | 1 | $243.31 |
| Cooling | Noctua NF-A12 | 1 | $21.78 |
| Cooling | Noctua NF-A14 | 4 | $119.75 |
| USB 3.2 | PCI-E to USB 3.2 Expansion Card | 1 | $44.99 |
| Backup Storage | QNAP TR-004 (w/ 4 4TB WD Red Drives) | 1 | $499 |
| SATA Cables | Cable Creation Mini SAS to 4 SATA | 1 | $9.79 |
| $3470.83 |