Introduction
Xigmatek was founded in 2005, and have released a wide range cooling and power supply products since then. Their company philosophy is the acronym “I.C.E.”, or Impressive, Creative, and Essential. Today, we’re going to look at their HDT-S1283 Heatsink, featuring direct-touch heat pipes. Will it perform and stand up to their philosophy?
Packaging
The HDT-S1283’s packaging is probably the biggest heatsink box I’ve ever opened, and that’s because it’s the biggest heatsink I’ve ever opened! I’m not a big overclocker, so I’ve never had a need to go beyond a stock heatsink.
The front of the box has a window that displays part of the 120mm Fan, as well as the Xigmatek sticker on middle of the fan. Below the window is the primary feature of the heatsink, the “Heat-pipe Direct Touch” technology, as well as a short feature list.
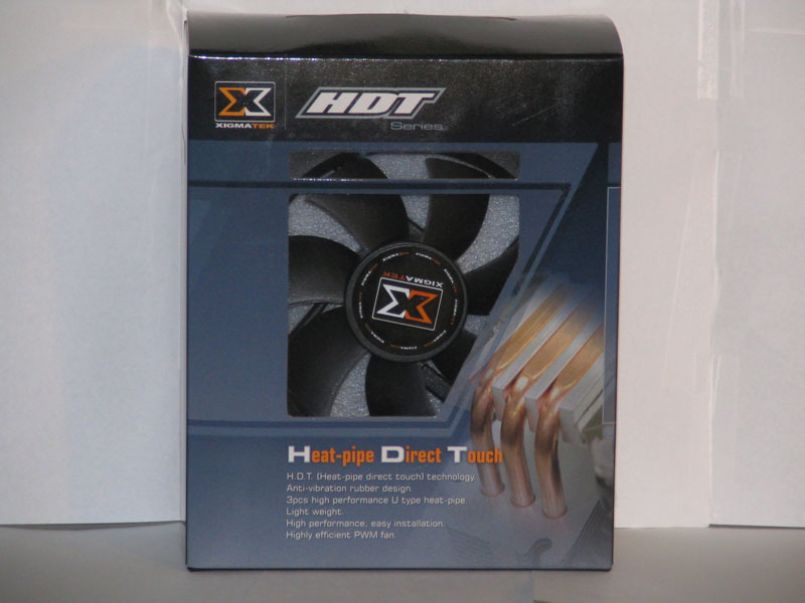
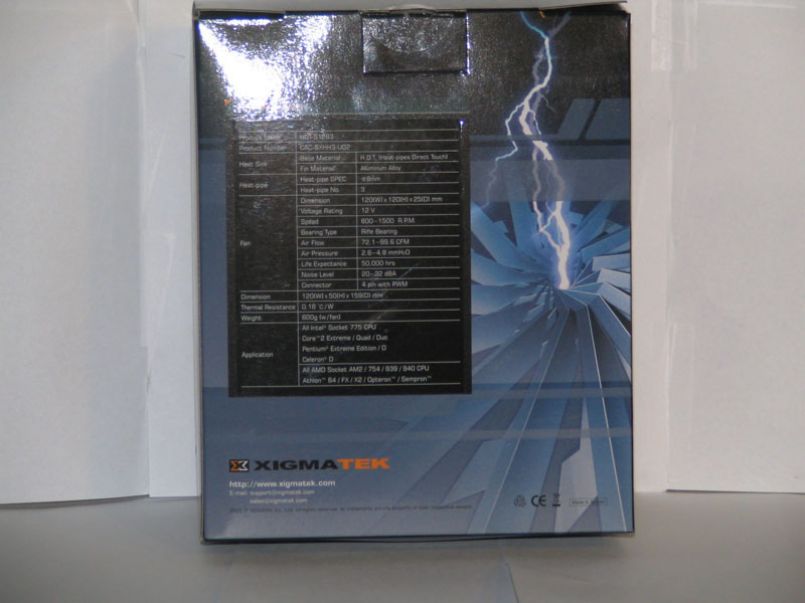
Either side of the box has either pictures or applications for the heatsink (don’t worry, they’re all computer-related), while the back gives a full list of specifications.
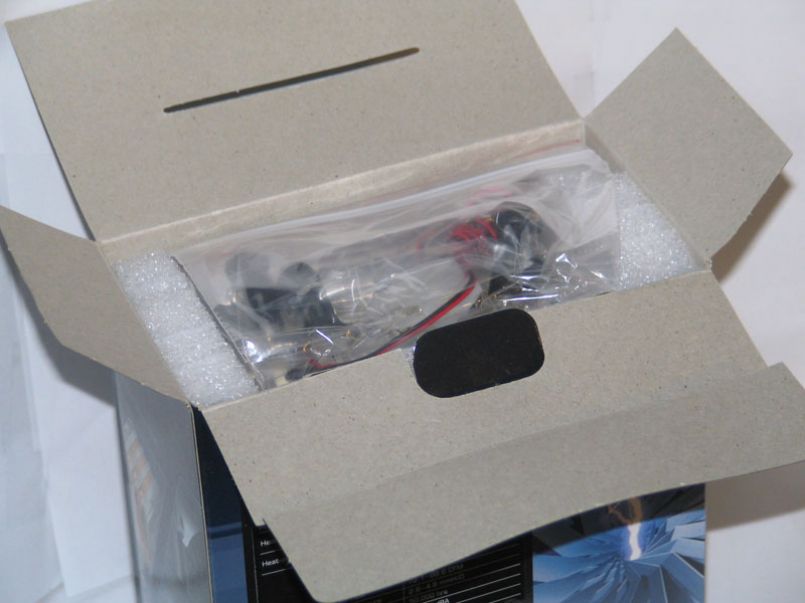
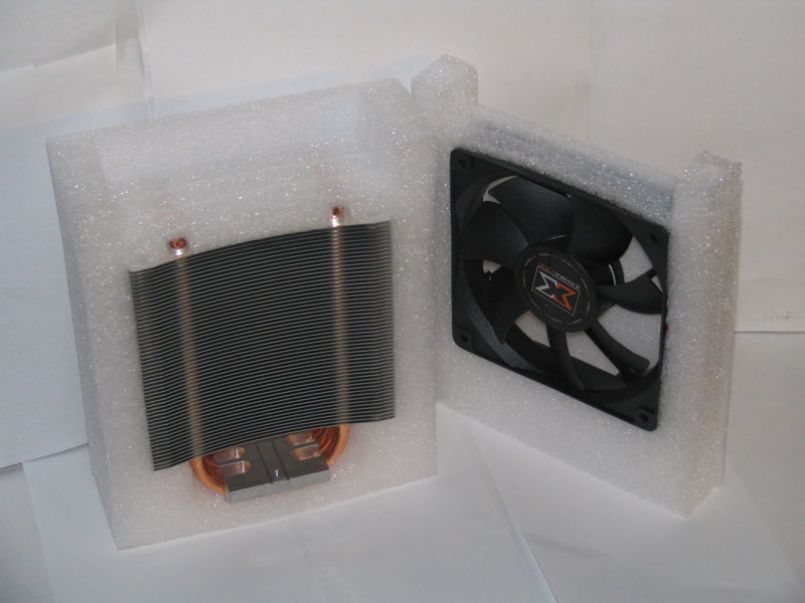
Opening up the box, I first came across a bag of all the accessories and clips for the heatsink. I put these aside, then pulled out the foam that held the heatsink itself. The heatsink and fan are two separate pieces (some assembly required), so they were packed separately.
Appearance
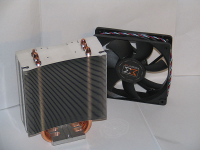
After removing the fan and heatsink from the foam, I become much more appreciative of their size. This is a massive heatsink.
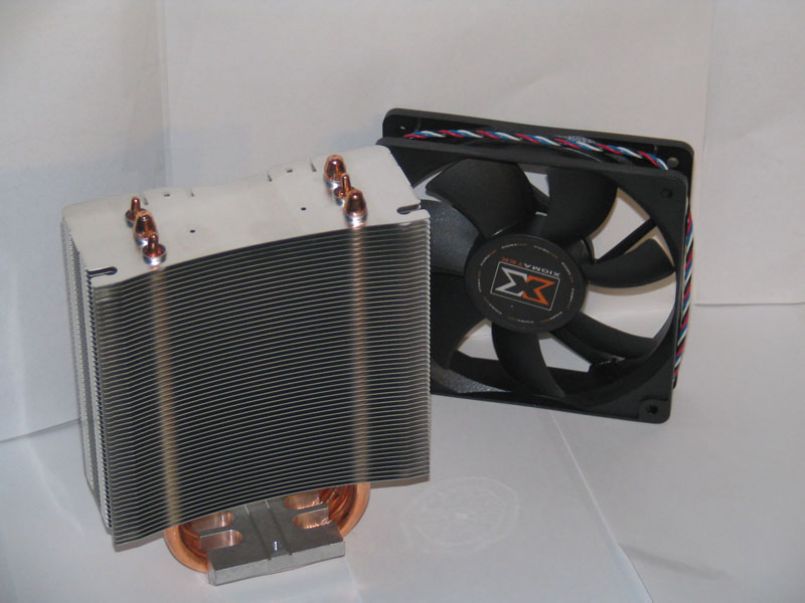
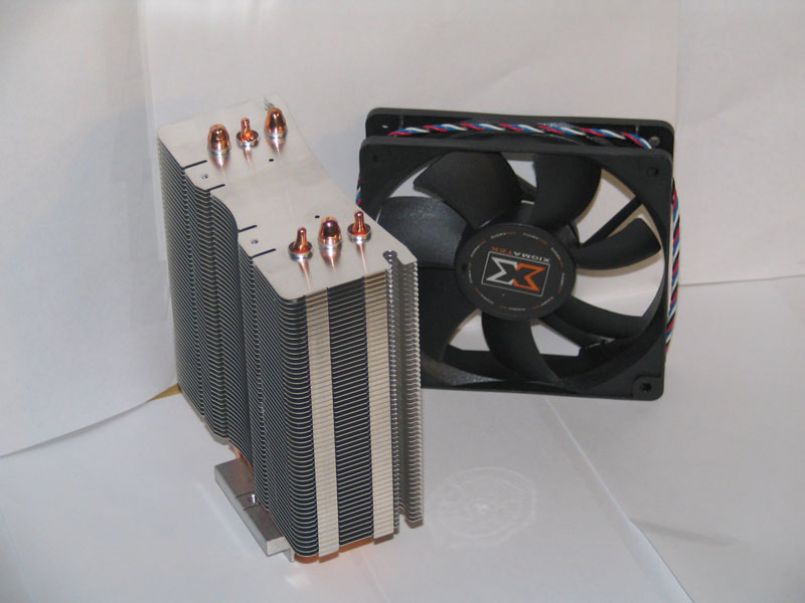
There are three “U”-Shaped heatpipes running through the heatsink. Unlike other heatpipe-based units that have the heatpipes running through a pre-drilled hole in a copper or aluminum base, the HDT-S1283’s heatpipes are part of the base. This is what Xigmatek calls “Heat-Pipe Direct Touch” technology. With the heatpipes right against the CPU, there should be a much faster heat transfer, resulting in much cooler CPU temperatures.
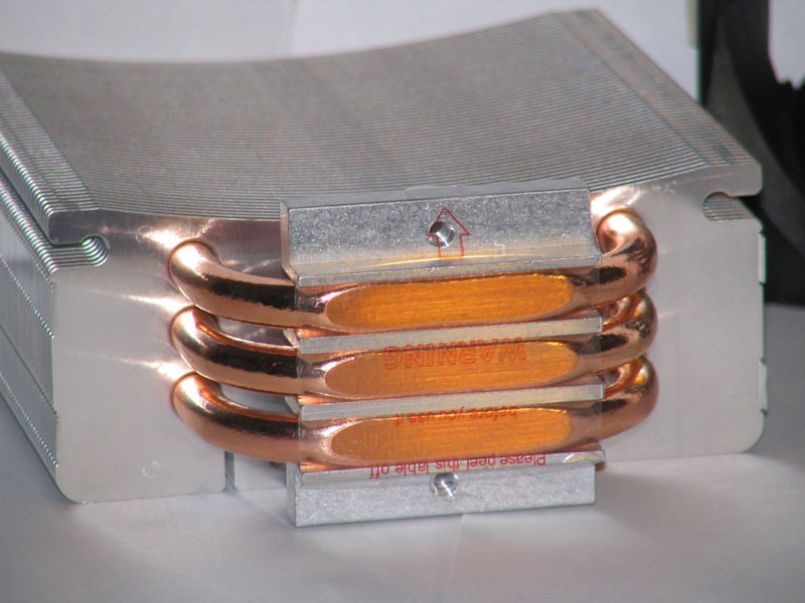
As the heatpipes extend upwards, multiple layers of “fins” are attached. The heatpipes transfer the heat into the much thinner finds, and then the air blown by the fan takes the heat from the fins.
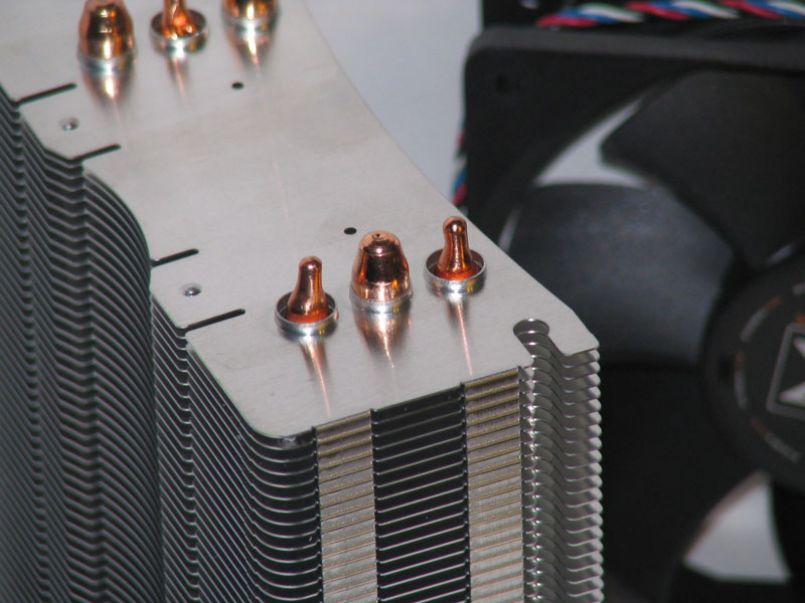
Overall, it’s an attractive heatsink that doesn’t go out of it’s way to be the bling-bling of today’s computer systems. I am, however, slightly concerned that it may not fit into my case because it’s so massive.
Features & Specifications
The HDT-S1283 packs a full list of features that set it apart from other heatsinks. Aside from being compatible with both Socket 775, Socket 939, and Socket AM2 processors, the HDT-S1283 also sports power-efficient fan and light weight. Let’s look at the full feature list below:
- H.D.T. (Heat-pipe direct touch) technology.
- Anti-vibration rubber design.
- Particular spoiler design.
- 3pcs high performance U type heat-pipe.
- Light weight.
- High performance & easy installation.
- 120mm highly efficient PWM fan.
- 3 in 1 application: LGA775 push-pin/K8 & AM2 tool-less clip.
Most of the massive heatsinks I remember from the days of the non-64-bit Athlon were so heavy that they could damage the motherboard unless screwed directly to the motherboard. Thankfully, even with the packaging, I didn’t think this heatsink was that heavy.
For those unaware, “PWN” fans are on 50% of the time, and off the other 50%. It’s a unique approach to consume less energy, but maintain performance.
These features are made possible through the extensive list of the fan’s technical details below.
| Product Name | HDT-S1283 |
| Product Number | CAC-SXHH3-U02 |
| Outside Dimensions | 120(W) x 50(H) x 159(D) mm |
| Heatsink Material | Aluminum Alloy |
| Dimension | 120(W) x 120(H) x 25(D) mm |
| Voltage Rating | 12V |
| Speed | 800~1500 R.P.M. |
| Bearing Type | Rifle Bearing |
| Air Flow | 56.3 CFM |
| Air Pressure | 1.57 mmH2O |
| Life Expectance | 40,000 hrs |
| Noise Level | 27.2 dBA |
| Connector | 4 Pin with PWM |
| Weight | 600g (w/fan) |
| Thermal Resistance | 0.16 ?/W |
| Application | All Intel Socket 775 CPU Core 2 Extreme / Quad / Duo Pentium Extreme Edition / D Celeron D All AMD Socket AM2 / 754 / 939 / 940 CPU Athlon 64 / FX / X2 / Opteron / Sempron |
For reference, Intel recommends a maximum heatsink weight of 435 grams. The HTD-S1283 weighs in about 165 grams over this number. I wonder if it will cling to the heatsink equally? That is, how well it covers the entire CPU without leaning downwards.
Installation
The HDT-S1283 comes with a very detailed, multi-lingual set of instructions. The instructions comes in three parts: Spoiler installation, AMD Installation, and Intel installation. The spoiler is universal, regardless of CPU architecture, but we’re going to look at the Intel installation specifically.
The spoiler merely slides into the fins. Ideally, it should lock into place, but we had trouble getting it to stay. In the end, we left it off. It’s meant to cool the components around the CPU by re-directing air from the fan. We don’t feel this as being a giant necessity.
The next step is to screw in the legs for the Intel LGA775 push-pin screws. These screw in on the underside of the heatsink. While installing these, you’ll notice the grooves between the copper and aluminum in the base. Normally, you’ll want to “lap” or “mirror-finish” the underside of a heatsink for best thermal transfer. The grooves allow you to apply thermal grease without having to worry about damaging the CPU by applying too much. The grooves allow for an “escape” of excess grease.

After these are installed, you can apply the supplied (or your own) thermal compound to either the CPU or base of the heatsink. The manual suggests the bottom of the heatsink.
I hate Intel’s latest method of installing heatsinks. I’ve also felt the good old-fashioned clips were the best. With the push-pin screws, you have to first ensure they are all turn to the right and expanded to full length. Then you have to align them perfectly with the motherboard so you don’t break any of the plastic. Hopefully you get them all in on the first try, but chances are you won’t. I didn’t, and I had a hell of a time trying to work around the heatsink to turn the last push-pin.
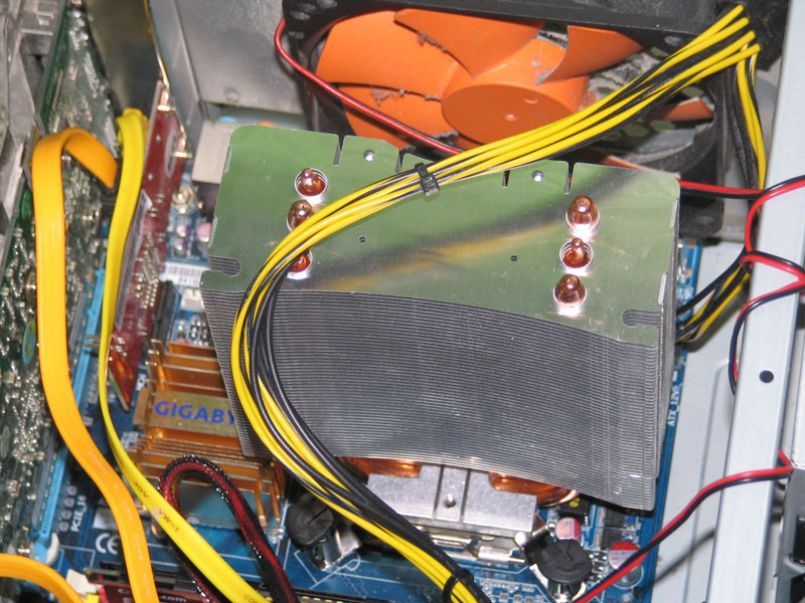
The last step is to mount the fan to the heatsink. This should be done last, because you most likely won’t be able to get to the push-pin screws while the fan is mounted. To mount the fan, Xigmatek supplies four rubber pieces that stick in the fan holes, then slide ito the heatsink’s fins. The rubber prevents vibrations against the heatsink, reducing the sound the fan makes.
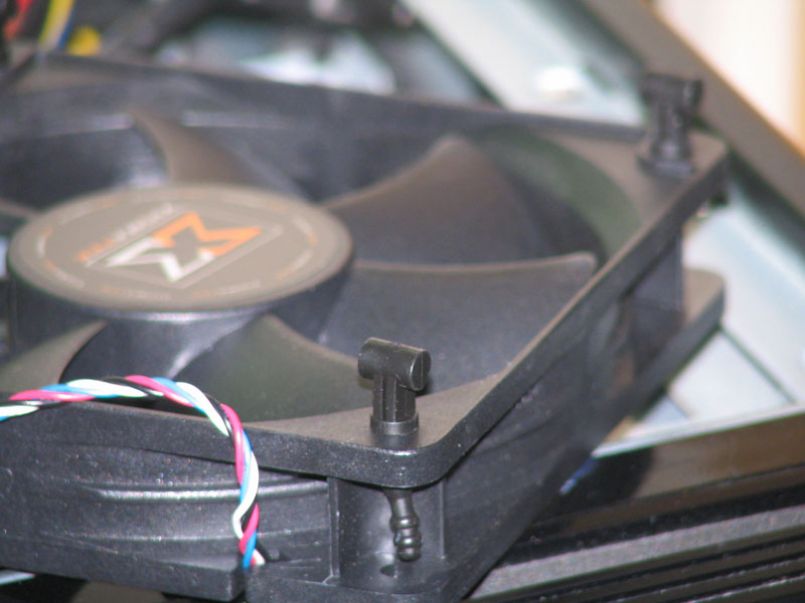
The fan comes with a 4-pin motherboard power connector, but Xigmatek also supplies a 4-pin to 4-pin molex adapter as well. Be warned, the fan runs at full speed when connected to a molex, and it’s loud!
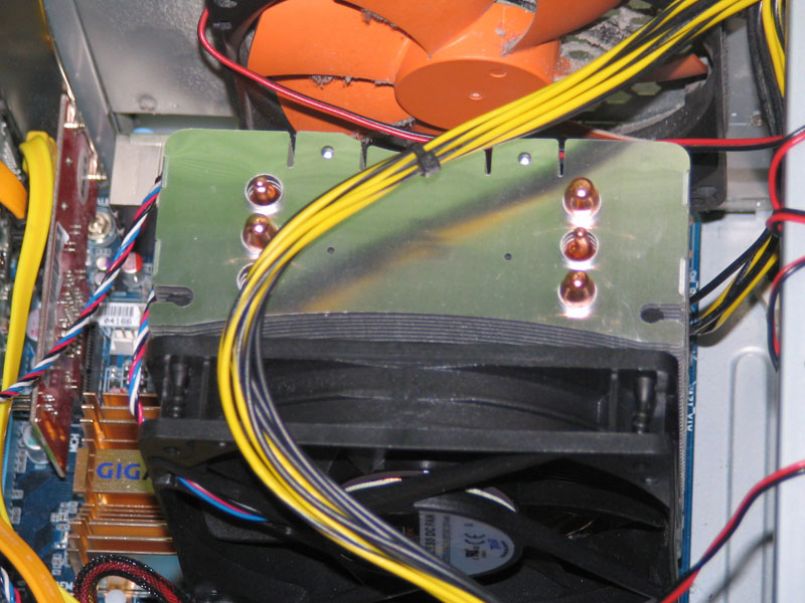
On a side note, you can see in the pictures that the heatsink does not lean downwards, and it seems quite firmly in place. So much for Intel’s suggested maximum of 435 grams for a heatsink.
Usage
After closing my case back up, I was surprised at how quiet the fan is when the computer is only idling. Of course, leaving your computer transcoding video while you sleep in the same room won’t be anywhere near as pleasant. You have been warned.
We compared temperatures against the stock Intel Heatsink that comes with their Quad Core processors. After installation was over, we let the heatsink settle in by looping a full Linux Kernel compile run for 2 days straight.
We ran two sets of tests on both Linux and Windows to find the temperature of the processor at both idle and under load. In Windows, we used CoreTemp to measure CPU core temperatures, and a frontend of LM_SENSORS in Linux.
First, we’ll look at our results in Windows. The system is running a BFG 8800GTX videocard, 2GB of Ballistix Tracer RAM, and an Intel Q6600 Processor. To load the processor, we played back a movie in iTunes while playing Unreal Tournament 3 with the highest settings. In Linux, we compiled the latest Linux kernel and the KDE4.0 source code at the same time with the make option of “-j5”. “-j5” will create a maximum of 5 simultaneous threads at the same time for the processor, and since we’re running a quad core processor, this should fill up the full computing power. Let’s see where the numbers fell.
| Heatsink | Windows Idle (°C per core) |
Windows Load (°C per core) |
Linux Idle (°C per core) |
Linux Load (°C per core) |
| Stock Intel | 49 – 48 – 46 – 46 | 59 – 58 – 55 – 56 | 45 – 45 – 43 – 44 | 59 – 59 – 54 – 56 |
| Xigmatek HDT-S1283 | 35 – 35 – 33 – 33 | 43 – 42 – 38 – 38 | 34 – 36 – 32 – 33 | 43 – 43 – 39 – 38 |
The HDT-S1283 knocked our processors temperatures by a whopping 13°C while idle, and 16°C while under load! This is a true improvement over Intel’s stock heatsink. I did notice that while under load, the fan got considerably louder, much like how loud it was when it was connected directly to a molex connector.
It can also be noted that the idle temperatures are lower for Linux than Vista. My best guess it that it’s Vista’s fault this is so. Vista simply uses more resources to function, unlike Linux that uses the bare necessities.
Conclusion & Final Thoughts
I never thought I’d be one to find a reason to endorse an enormous processor heatsink. At over 120mm in height, the Xigmatek HDT-1283 is enormous. However, after putting it through the tests we did, I can’t not say it’s a fantastic asset.
After dropping my CPU’s temperature down by an average of 14.5°C, I can’t think of any reason not to purchase this heatsink. I may not be an overclocker, but it’s also a comfort to know that your processor won’t be overheating any time soon. The heatsink’s 120mm fan is also sure to get the airflow moving inside your case, most likely cooling down the rest of your components as well.
The HDT-S1283 comes in an attractive package, and would probably look pretty cool from a window view on a case (something my current case doesn’t have). For a new contender in the world of computer cooling, Xigmatek definitely knows how to create a great thermal solution.
Pros
- Attractive
- Awesome cooling through it’s innovate “Heat-Pipe Direct Touch” technology
- Fairly quiet
- Near silent!
Cons
- May not fit all cases


